How do you explain complex energy concepts to a horde of hyper middle schoolers?
Graphics & Illustrations, Work in Progress! Client TBA when the exhibit opens


How do you explain complex energy concepts to a horde of hyper middle schoolers?
Graphics & Illustrations, Work in Progress! Client TBA when the exhibit opens
Starting in 2018, I worked with Wes Aycock, James Clark, and the rest of the AEDAN design-build crew to create finely crafted landscapes and structures. As of May 2024, I’m moving on to other adventures, and supporting AEDAN on an as-needed basis.
I served as Lead Designer on the following projects, coordinating the design processes and executing most of the design work from Pre-Design through Construction Documents and Construction Admin. Thanks to the owners and build crew for making the magic happen!


Lead Designer: Steven Valenziano
Art Direction & Oversight: Wes Aycock and James Clark (owners of AEDAN Workshop)
Build crew: Scott Dempsey, Jeff Silvius, Carl McCracken, Joe Burns, Tazdyn Sargent
Consultants: Andy Terrell of Lysaght and Associates, Alan Parker of Goliath Tech, Chris Wolfe of Bryant Durham
2 inches of exterior polyiso insulation, continuous air and water barrier, standing seam roofing, cedar T&G + 26ga steel siding, and about 3,876 lessons learned 😅


Illustration, words, and design by SV, as part of a larger publication to be released in 2023. Art direction, editing, font selection by Bike Durham (Carmen Kuan & Justin Laidlaw).


Rhino is more and more advantageous as a primary design AND drafting solution. (Rhino Forum “does anyone use as primary app”, …). Advances in Rhino modeling and Grasshopper have made Rhino more and more attractive, at the same time that major, big-budget architectural firms are increasingly frustrated with the established players (Dezeen). That being said, there are difficult sticking points, including managing layer visibility in 2d drawings (aka layouts & details). Hopefully these methods are easily adaptable for your application, the principles should be applicable to architecture, exhibit design, etc.
It’s the first method you learn about, but it also has a major downfall: if you create a new layer, it will be visible in ALLLLLLLL of your details. The only way to turn it off in all of them (that I know of) is to double-click into each of them and run HideInDetail (or use the layer palette). Extremely annoying :*(
EDIT 2022-08-04: I don’t recommend Method 1. The main pitfall is that Layout Layer visibility AND Detail Layer visibility must be changed for each layer you wish to change visibility for. This leads to 2x the number of clicks for each layer you wish to edit. I believe this is a bug in Rhino, but I’m not sure. Either way, I no longer recommend this method.
By using the Layer Print Width, you have the opportunity to keep a layer off in all existing details / layouts by default. Downsides of the Print Width method:
Here’s how to use the method, for a few situations:
Print Color = black or gray – whichever will be used most commonly
Print Width = as desired
Layout/Detail print widths = No Print or custom, as appropriate. If you want to turn a layer off in all details on a layout, use the layout override instead of the detail. It will allow you to turn off the layer in all details on that layout.
No overrides for layout or detail color, except where needed
Print Color = black or gray – whichever will be used most commonly
Print Width = No Print
Layout/Detail print widths = set override per-detail, as appropriate. Ensure that you set both Layout and Detail print width, setting one and not the other will have no effect. Set detail print width as desired, and set Layout print width to Default
No overrides for layout or detail color, except where needed
Print Width method works, but the built in Layer on in this Detail Only feature is easiest:

If you’re creating a new layer that is similar to others: consider duplicating an existing layer rather than creating new ones from scratch.
I’d almost given up on the standard Rhino methods of controlling detail visibility (Rhino 7 help), but then I discovered the two scripts on this Rhino forum (as of this writing, there are 2 scripts: one by egdivad and the other by Lahos). After a small amount of testing, it seems possible to use standard Rhino methods in conjunction with these scripts to make everything wonderful and easy as puppies and butterflies. I hope to update this post once I find out.
Edit 2022-08-04: the SafeLayout plugin is a higher performing version of the scripts mentioned above. I believe this plugin is written in C, and so is much faster than the Python scripts.
These other methods offer some additional control / potential, but I haven’t personally found them to be game changers in regards to this challenge:
A whole-building environmental mural that aims to immerse visitors in the wonder of nature while integrating tightly with the hands-on museum exhibits…

CREDITS:


Approximately 8×12 feet size, this mural depicts a few of the sculptures that Gizmo Art Production has built and installed in the San Francisco Bay Area.
Other fun stuff scattered throughout: a playful jab at the CEO’s music habit, Janis Joplin’s house, Miss Doubtfire’s house, 3 bikes, moustaches, a very prominent paintbrush, and grafitti by Barry McGee.
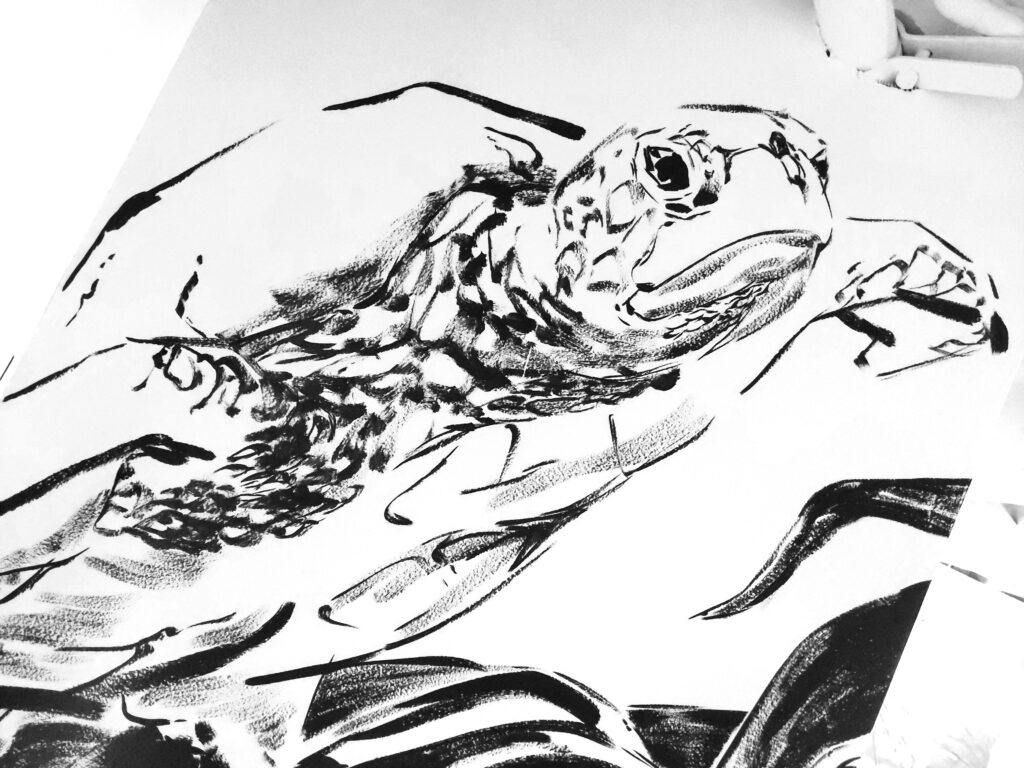
Medium: India Ink
I helped scientist Rohan Maddamsetti create a Muller Plot and supporting diagrams for his paper on E. coli evolution. Rohan provided the raw data and we worked together to merge it together into the final diagram using Adobe Illustrator.
The paper was awarded the “1st Centennial Award For Population And Evolutionary Genetics.” More info from the Genetics Society of America.
The full scientific article: Adaptation, Clonal Interference, and Frequency-Dependent Interactions in a Long-Term Evolution Experiment with Escherichia coli

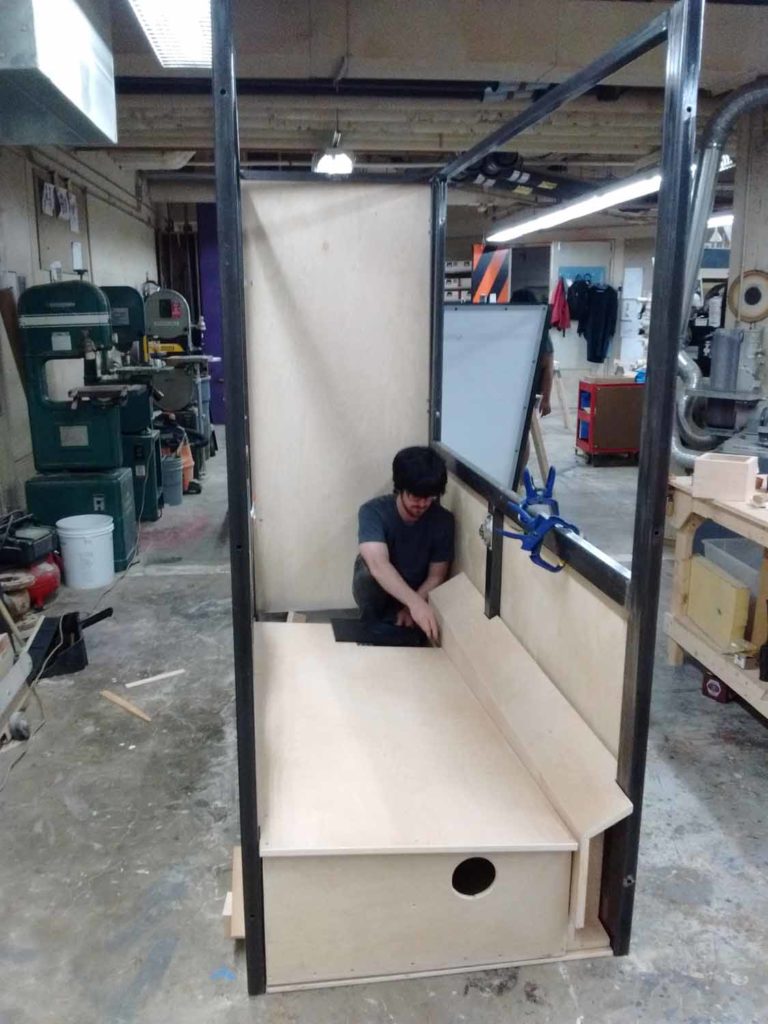
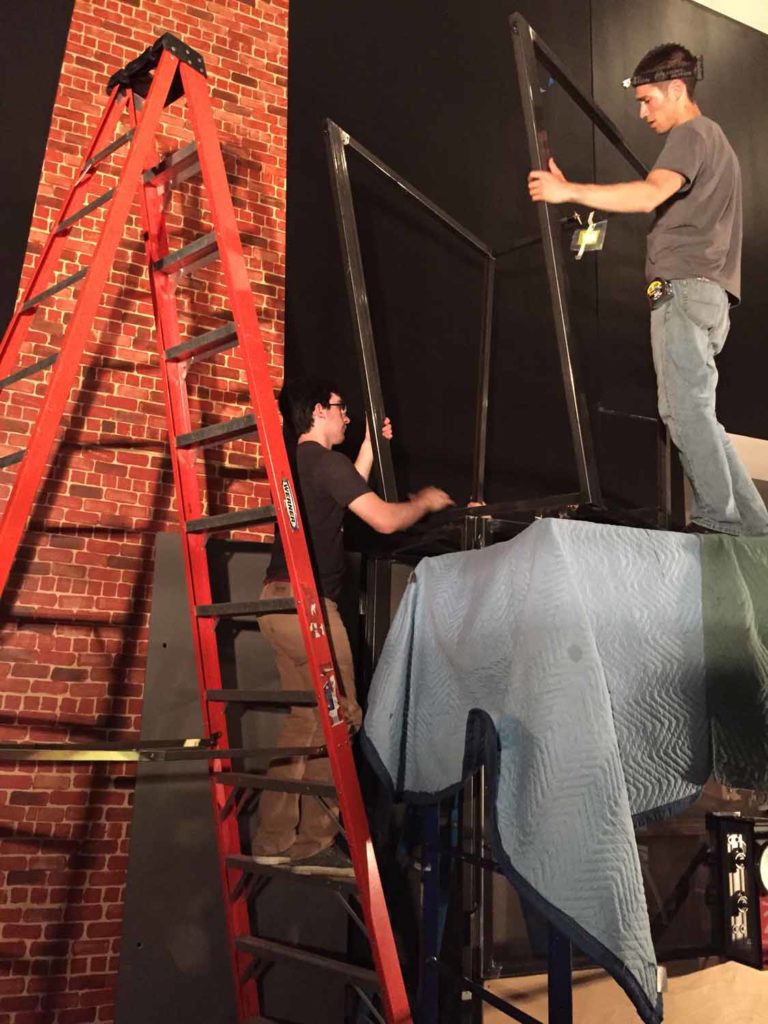
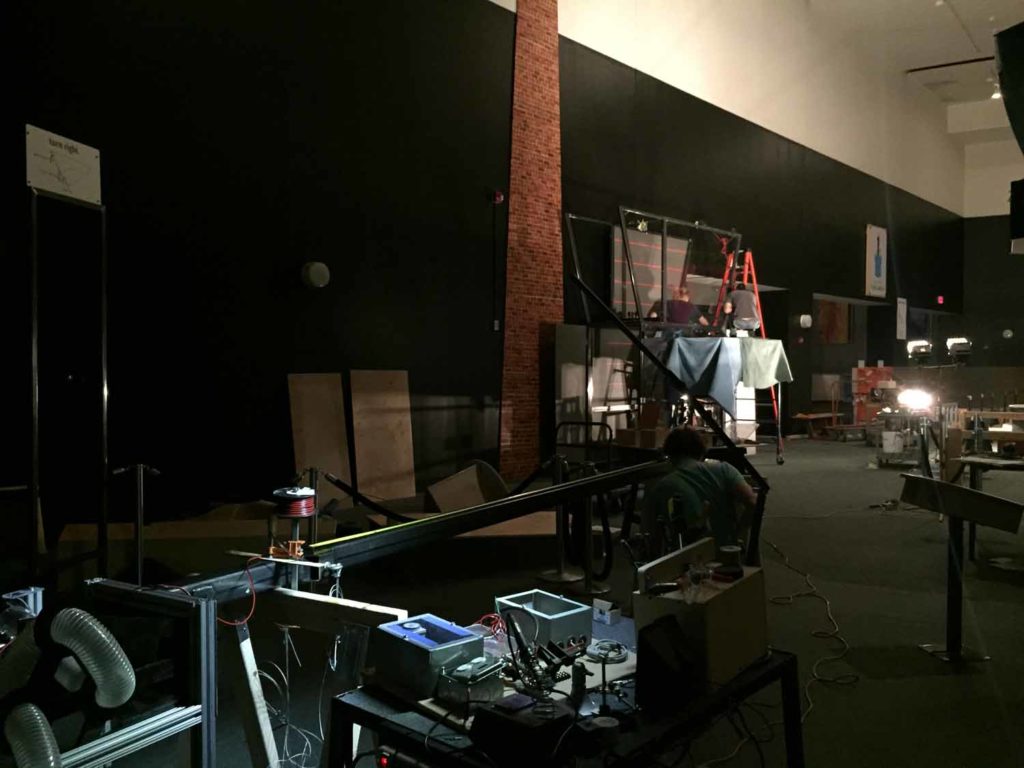
Take a stack of exhibit ideas dreamt up by the Education staff, and turn them into an exhibit in one year, on a tight budget. The exhibit must be movable so that the exhibit hall can be used for large rental events.
Science & Main is one of the most popular exhibits at the Museum, and was achieved at a fraction of the cost of most other exhibits in the museum. See the captioned photos below for details and process photos…


View these projects in more detail:

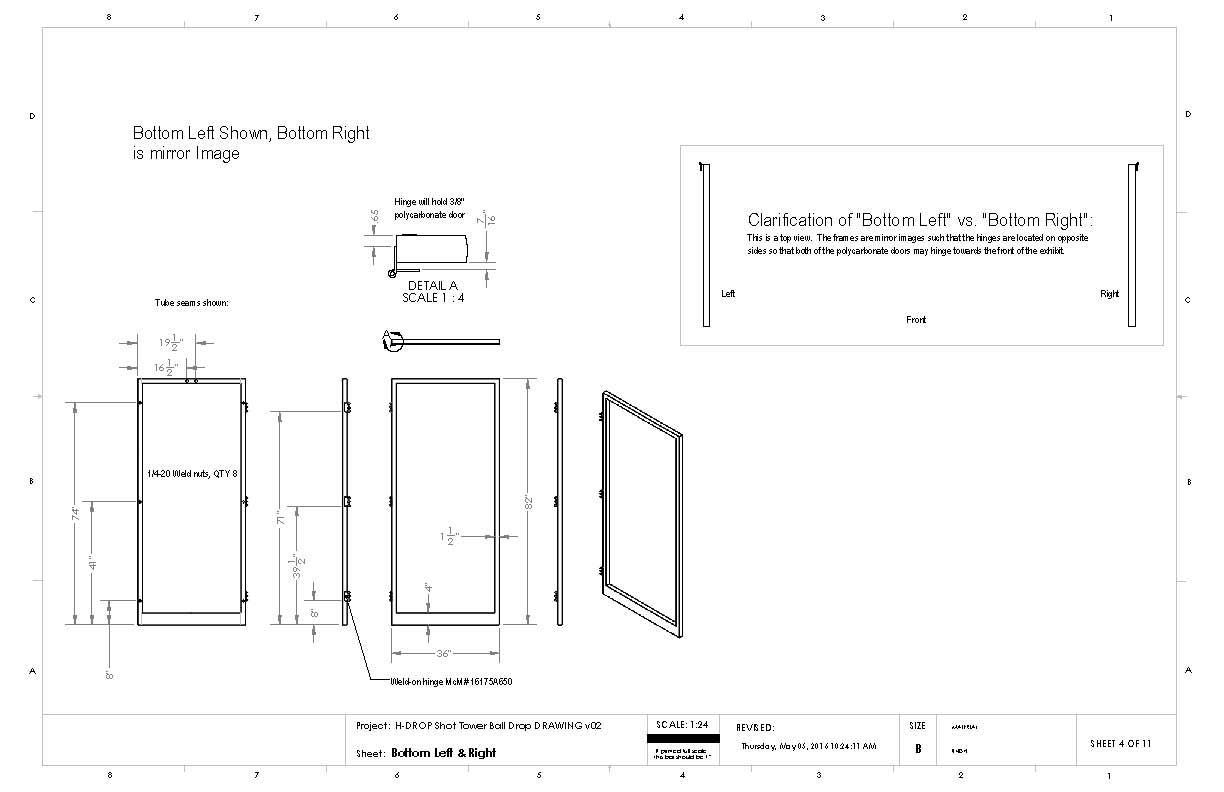
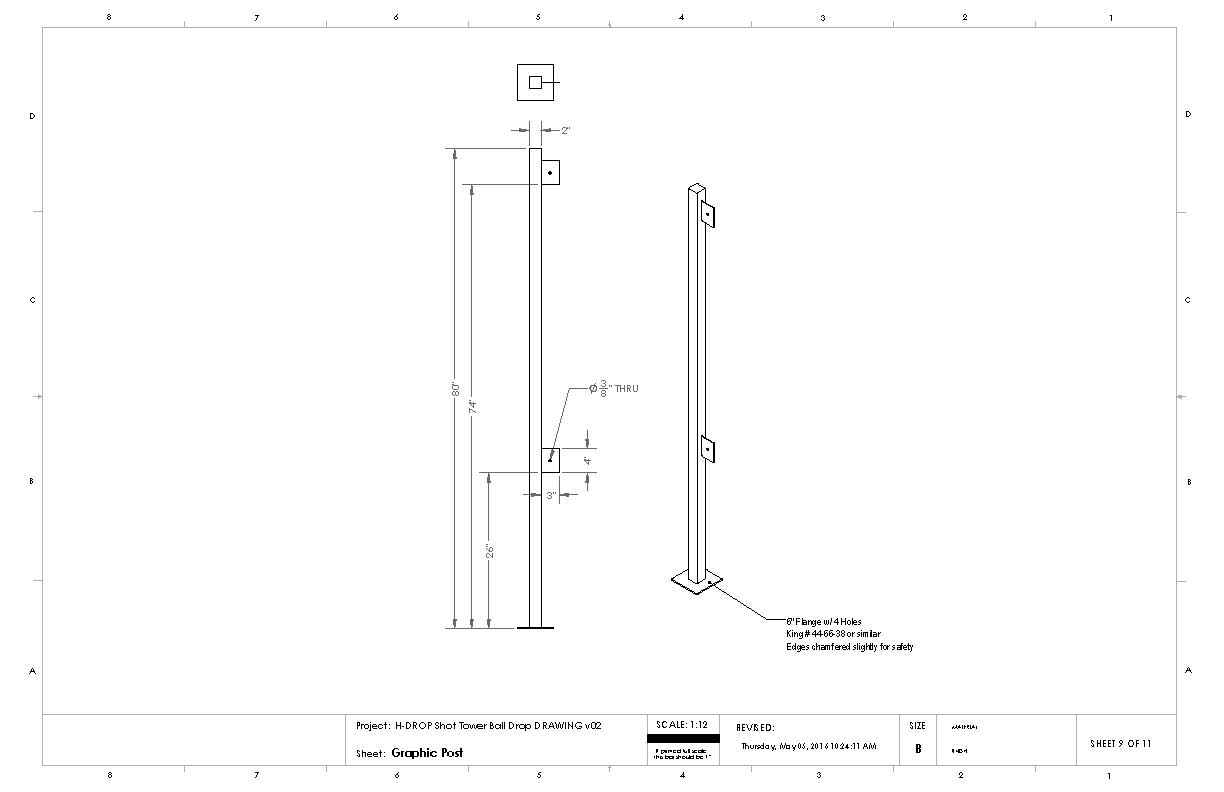
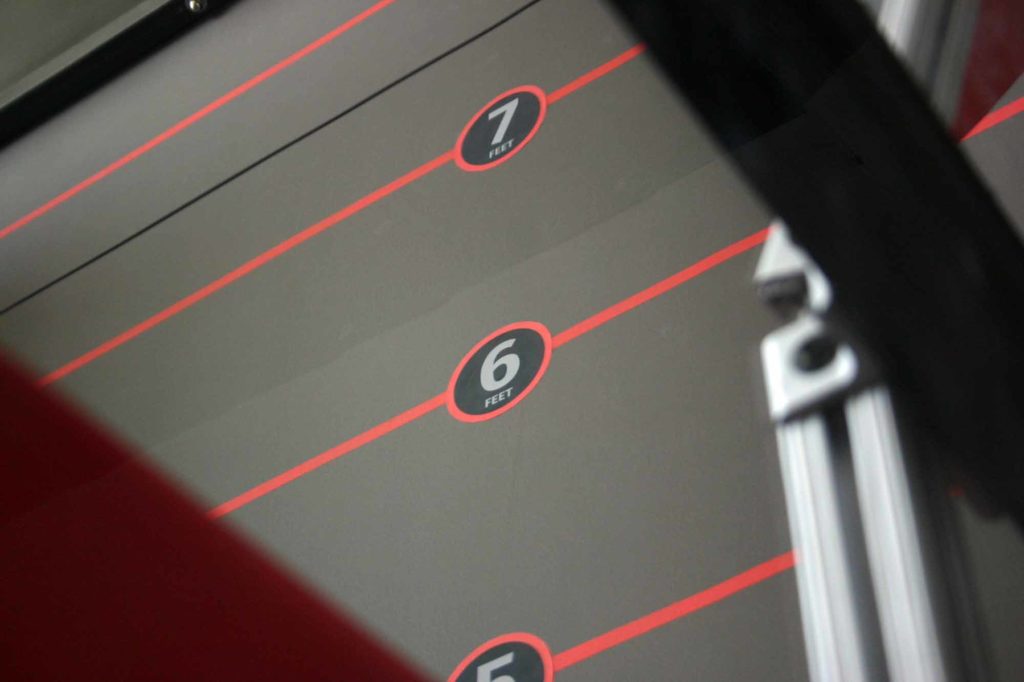
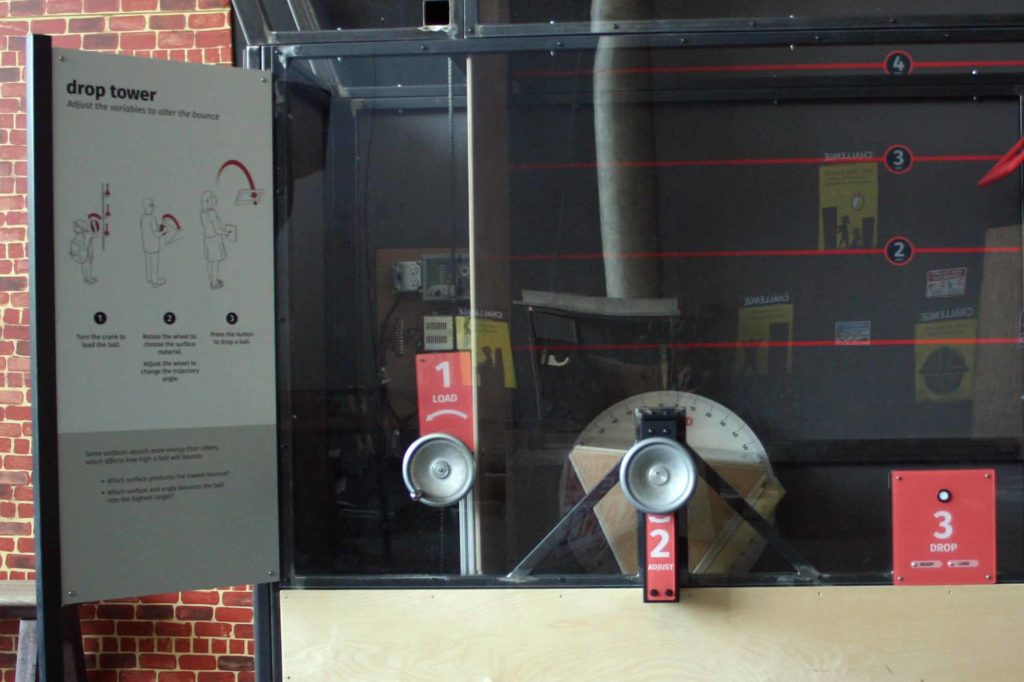
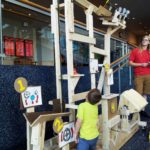
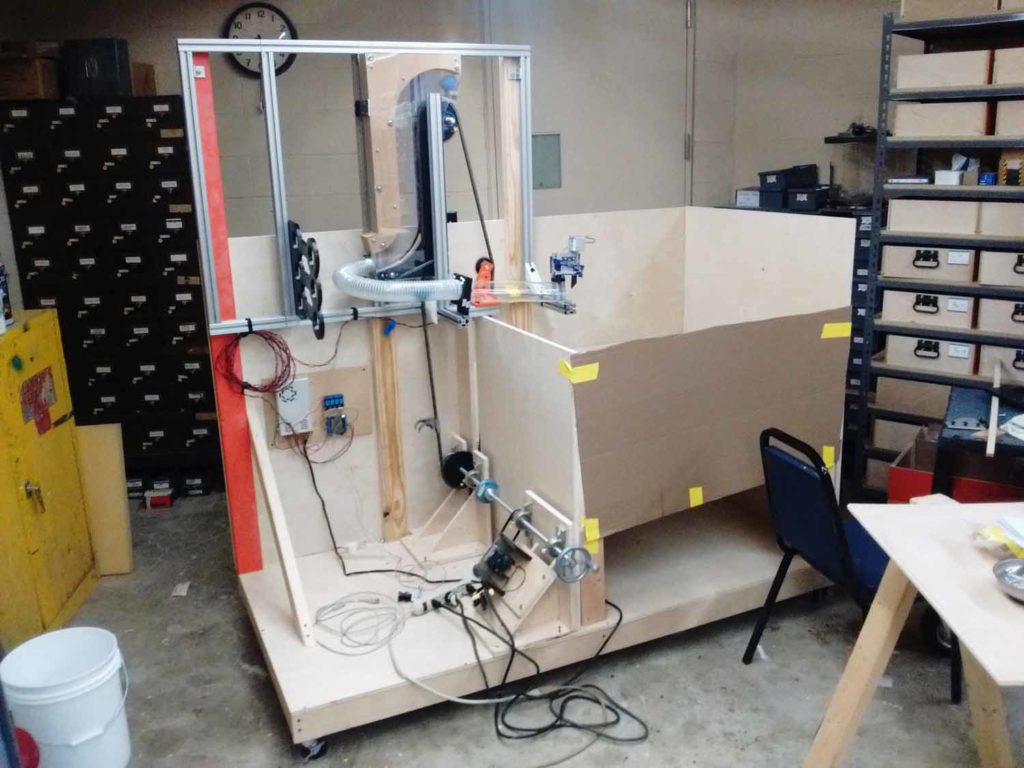
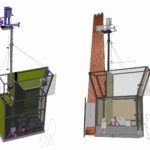
The Drop Tower enables visitors to repeatably drop a racquetball 20 feet onto an angled surface. The angle and material of the surface can be changed, enabling users to experiment with the 2 variables and discover how they affect the trajectory and bounce height of the ball. The targets provide a goal for visitors to aim for, though many simply experiment on their own.
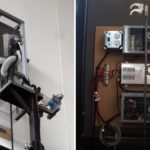
We built and tested several prototypes to determine whether or not our plans were visitor-friendly, the reliability of the ‘dropper’ mechanism, and the feasibility of the chain conveyor. See images below for more details…


Below are examples of construction drawings I created with Solidworks. They were given to a commercial welding company, who fabricated and delivered the pieces.